


Table of contents
- Step 1: pip install Vale
- Step 2: create a .vale.ini file
- Step 3: vale sync
- Step 4: run Vale
- Step 5: (Optional) Advanced setup: building a custom style
- Conclusion
- Work with Weesho Lapara
- Additional resources
A recent project called for a documentation portal, and the discovery call reshaped the engagement before any writing began. The client had scoped me as a content writer: I’d supply the words, and they’d find someone else to build the site. Once it was clear I worked in a docs-as-code workflow, the brief widened to cover both.
We set it up accordingly: Markdown, a static site generator, and a build pipeline running through the client’s existing Azure DevOps infrastructure. The content grew quickly. By the end we had close to 90 files of prose, images, Markdown, and HTML. Naturally, before handing it over, I owed them a final proofread.
But reviewing 90 files by hand is exactly how inconsistencies slip through. The alternative was a linter: a tool that reads every file and flags grammatical and stylistic issues automatically. After comparing proselint and Vale, I picked Vale.
Disclaimer: I installed vale as python package. So, this guide is based on the same assumption that you installed vale’s python package.
Step 1: pip install Vale
After a quick search, I discovered that some kind samaritan had created a python package to install vale. This made the job cleaner and easier. If you haven’t already, run the following command on your terminal window.
pip install valeOptionally, you can verify whether the installation was successful by running vale -v in the same terminal window.
vale -vStep 2: create a .vale.ini file
Vale reads its configuration from a .vale.ini file in the root of your documentation. This is the step most people miss, and the reason for the “file not found” error. Create the file and tell Vale where your styles live, the minimum alert level to report, and which style packages to base your checks on.
StylesPath = styles
MinAlertLevel = suggestion
Packages = Microsoft

[*]
BasedOnStyles = Vale, Microsoft
StylesPath is where Vale looks for style packages. By setting this configuration to styles, you are telling vale to create a new directory — styles — in the root directory. This directory should have the style guide you wish to use.
MinAlertLevel sets the minimum severity Vale reports, from suggestion through warning to error.
Packages lists the pre-built style packages to pull in, such as the Google or Microsoft Style Guide. Simply use Packages = Microsoft to pull in the Microsoft style package, which is a can also serve as a default for your technical writing needs.
BasedOnStyles applies those styles to the files matched by the section.
Now, this is not an exhaustive list of configuration. Check out vale’s documentation site for a complete list of configurations.
Step 3: vale sync
Run vale sync to download the style packages named in your config into your StylesPath. Without this step Vale has the rules named but not the actual style files.
vale syncStep 4: run Vale
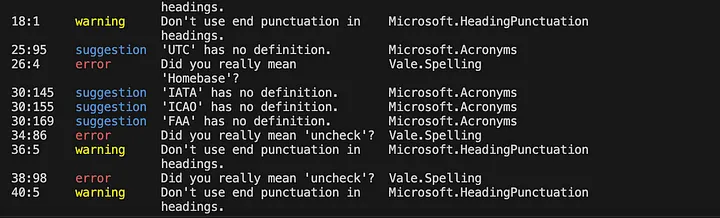
Now you can lint. Point Vale at a single file, or at the whole directory.
To run vale on a single file, use the following command.
vale path/to/file.mdTo run vale on all the files at once, use the following command
vale .You will see the output of these commands in the terminal window.
Step 5: (optional) advanced setup: building a custom style
The Microsoft package was a great way to start, but it didn’t take long on that documentation portal before I hit a wall. The client had their own quirks. They had a handful of words they never wanted used, product terms spelled a particular way, phrasing they’d rather avoid. A borrowed style guide can’t know any of that. It enforces someone else’s rules, not yours.
That’s where building your own in-house style comes in. And the good news is that it’s far less work than it sounds.
A style is just a folder of rules under your StylesPath, and each rule is a small YAML file. Two rule types cover most of what a team actually needs: substitution (flag a word, suggest a better one) and existence (forbid a word outright). Let me show one of each.
A substitution rule
Create a folder for your own style — I’ll called mine Studio, but use your team or client name — and add a file at styles/Studio/Wordiness.yml:
  extends: substitution
  message: "Prefer '%s' over '%s'."
  level: warning
  ignorecase: true
  swap:
    utilise: use
    utilize: use
    in order to: to
    leverage: use
    functionality: features
The swap map is the whole rule: the word on the right is what you want, the word on the left is what vale flags. The %s placeholders in the message get filled in automatically.
An existence rule
Some words you just want gone. Here’s one I use to catch language that can sound dismissive in a tutorial — styles/Studio/Condescending.yml:
  extends: existence
  message: "Avoid '%s'; it can sound dismissive to a reader who's stuck."
  level: suggestion
  ignorecase: true
  tokens:
    - simply
    - just
    - obviously
    - of course
    - easy
tokens is simply the list of words to flag. vale has more rule types — occurrence, repetition, capitalization, and others — but these two will take you a long way.
Switch your style on
Add your style to the BasedOnStyles line in the .vale.ini you created in Step 2:
  [*]
  BasedOnStyles = Vale, Microsoft, Studio
One thing that tripped me up: unlike the Microsoft package from Step 3, custom styles you wrote yourself don’t need vale sync. They already live in your StylesPath, so vale picks them up the moment you run it.
And that’s an in-house style in a few minutes, using the same handful of decisions your reviewers keep repeating, now enforced automatically.
Conclusion
Four steps get you from a fresh install to a working lint run: install Vale, create a .vale.ini, sync your styles, then run it. The configuration step is the one that trips people up, so once that file is in place the rest is straightforward. Happy linting.
Work with Weesho Lapara
Want Vale wired into your docs pipeline and CI with a style guide your team agrees on? If you’d like to automate enforcement on pull requests, see our guide on using Vale as a GitHub Actions merge gate. Book a consult or get in touch.